When do you need to use some form of Cloud Distribution?
If you consider this concept a form of caching, then you need it when your website passes a certain threshold in terms of users and the volume of data that is being sent out. The actual numeric figure depends entirely on your setup – you may have large files and sending them out of your server may fill up the available bandwidth. Or you may have a lot of users and may want to ease the load on the server by pushing some of this load to somewhere else.
Nevertheless, the purpose of this article is to show you how this is being done by using the AWS CloudFront.
AWS CloudFront
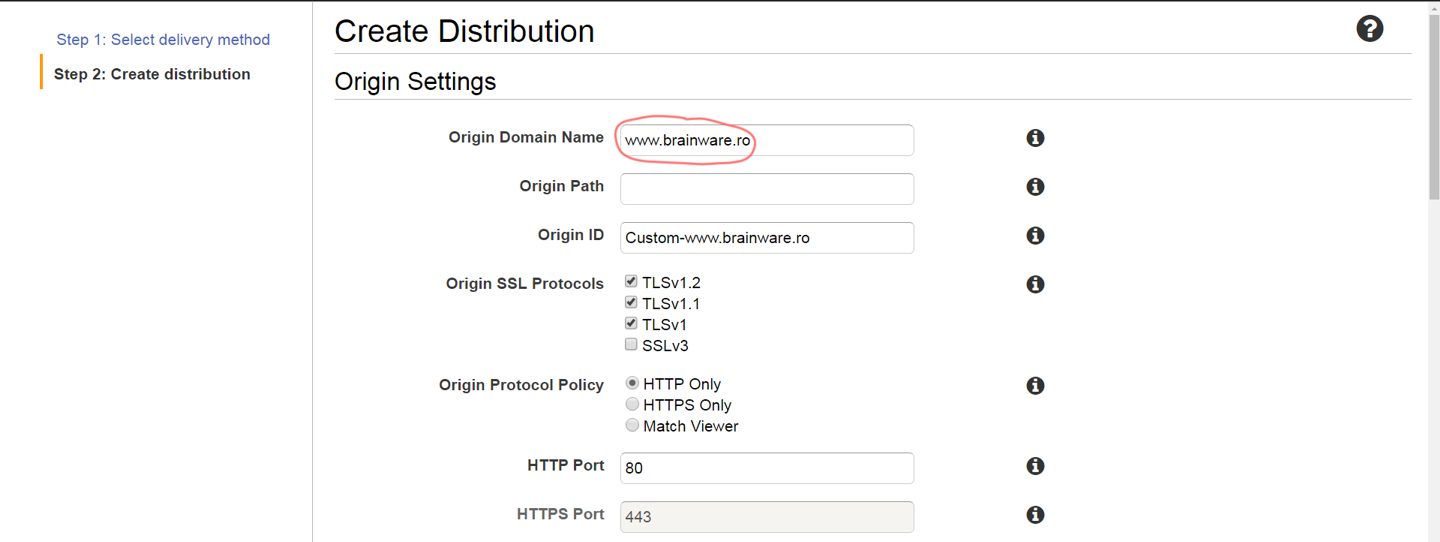
First, you need to go to the “CloudFront” option in the AWS Console and attempt to create a Web distribution. On the creation page you should first fill in your domain name as the distribution origin (the primary source of the content):
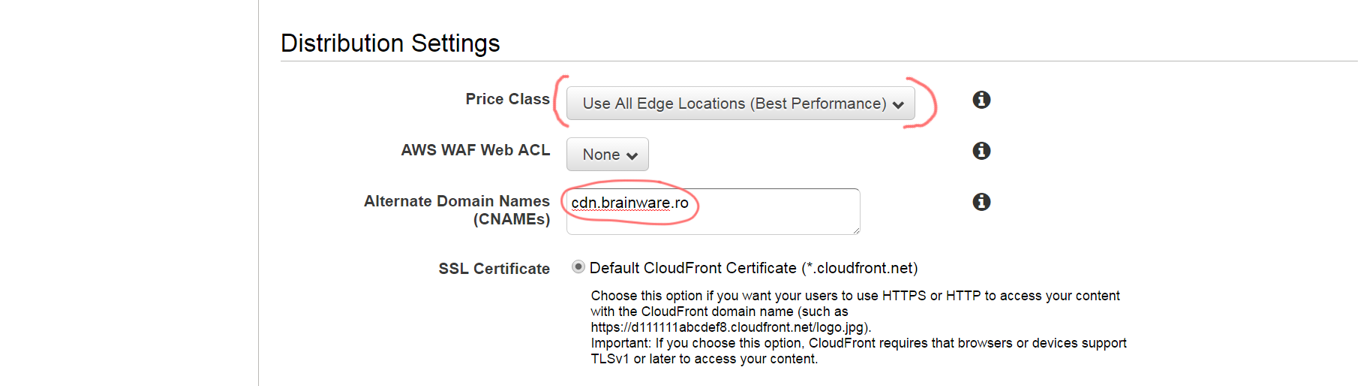
Scrolling down, you need to pay attention to 2 more fields:
The price class – it’s cheaper to only use the distribution facilities in the US and Europe; you may want to do so if your customers are located in those geographic locations only.
The alternate name of the distribution – this is the address that will be used to access content distributed by CloudFront. I have used the “cdn” acronym from “content delivery network” as the subdomain name.
NB: there are a lot of configurable fields in there. The 3 mentioned above are the mandatory ones to pay attention to in this particular context. All of them have their use, though; you may want to come back to them at a later date to fine tune certain parameters.
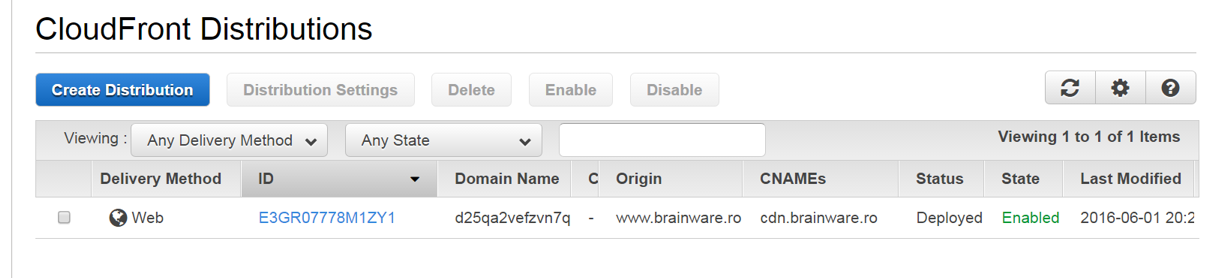
When you’re done with filling up the data, you have to just click on “create distribution” and wait for a couple of minutes (10 to 15). The final result (Status: Deployed) should be similar to:
DNS Record
Now that the distribution is created, you need to make the alternate domain name accessible. In Route 53 this can be easily achieved with an alias record:
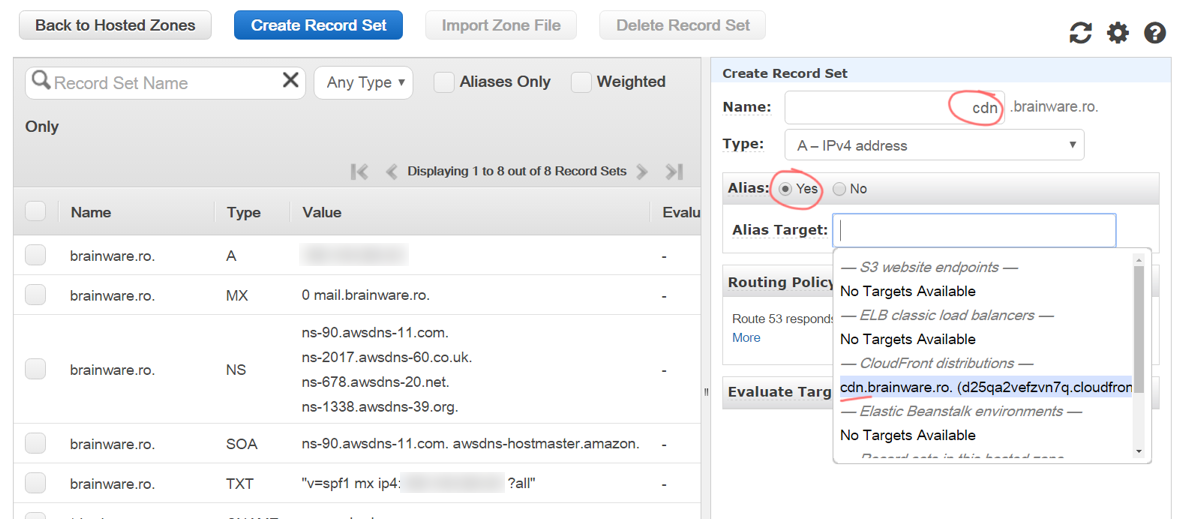
If you don’t manage the domain through Route 53, then you have to create a CNAME record to resolve the alternate name (e.g. cdn.brainware.ro) to the distribution domain name that you can get from the properties (e.g. xxx1234.cloudfront.net).
Website Links
Now that everything is set up on the AWS side, you need to look back to your website: you need to modify the links of the resources you need cloud-distributed (e.g. use the cdn-based url). There is no way around this by using url rewriting or any .htaccess trick – these act on queries arriving to your server. You actually want to avoid some of those by integrating with a Cloud Distribution platform so that the first request for that resource will be served by your local server while the subsequent ones (up to a TTL) are served by the Cloud endpoints.
For WordPress-based websites there are plugins that do this, so you may want to look into those (e.g. W3 Total Cache).
Practical Details
The complete list of “edge locations” (data centers used for CloudFront) can be found on the AWS CloudFront Details Page.
Please check the CloudFront service limits (e.g. the numbers of requests that can be served per second), even if a “normal website” is unlikely to exceed those figures.
One can find the detailed pricing schema on the AWS website. Please note that you’re being charged by usage only, not for simply setting up a distribution. The costs are calculated by adding up both the traffic and the number of requests. One cannot completely predict the next bill so setting up a Billing Alarm is advised.
That’s it for today, thank you for your read!
Note: This text was written by an AWS Certified Solutions Architect (Associate). Please do always work with an expert when setting up production environments.